Yesterday’s post gave you 12 tips to help you plan ahead for meals, ready staples and make the most of key kitchen appliances.
Ready to streamline the actual cooking process? Here are 18 more suggestions.
Join the “Flow Cooking” movement
The more you cook, the more you’ll find yourself creating shortcuts, skipping unnecessary steps and simplifying movement. Flow cooking is akin to “multi-tasking.” But instead of a frenetic, get-it-all-done headset, it’s about mindfulness.
When you come into the kitchen to cook, put first things first: Set pasta water to boil. Heat the oven. Then as you relax into a rote task—like chopping onions—let your mind move to the next step of the recipe, say peeling potatoes. After throwing onions in to sauté, peel the potatoes. As you wait for onions to soften, tidy up, prepare salad and perform routine tasks—always with an eye on the stove-top or oven.
Here are a few of my tried-and-true “flow cooking” short-cuts:
- Double-use pots, pans, bowls, utensils and appliances.
- Use one Dutch oven or large skillet for soups, sauces and fricassees. Julia Child may turn in her grave, but your food won’t suffer dramatically—and one-pot cooking makes clean-up a breeze. See Sequence-fry instructions, below.
- Multi-use your food processor or mini-chopper—and don’t wash in between chopping. When making marinara, for example, use your processor to chop onions. While they fry, use the chopper to rough-chop canned tomatoes—the tiny residual raw onion that mixes with the tomatoes will make virtually no difference in your sauce.
- Use two large Pyrex measuring cups to combine mixing and measuring—see photo below—rather than multiple bowls and measuring cups. Measure and mix dry base ingredients in an 8-cup measuring cup. Melt butter, measure and combine secondary “wet” ingredients in smaller 4-cup measure.
- Sequence food preparation to minimize cooking and clean-up time.
- Measure and mix dry ingredients first, using a single whisk or beater, see photo below. Use the same utensil to mix next-step “wet” ingredients or to cream butter. Then use the same utensil to blend wet ingredients with dry. A stiff medium-sized balloon whisk works well, as do vintage mixing gadgets you’ll find at garage sales and flea markets. See my absolute favorite, Grandma S.’s Formay Helper, in the photo below.
- Sequence-fry or sauté when making soups, sauces and stews, using one pot to cook all ingredients. Start with most delicate ingredients, such as mushrooms. Cook, reserve, then wipe pan with paper towel. Add more oil or butter, fry or sauté additional vegetables in sequence, starting with firmest—such as onions. As firmer vegetables soften, move them to sides of the pan to make room in the center—the hottest section—of the pan for softer vegetables. For dishes that use both dry and juicy ingredients, sauté or fry “drier” ingredients—meat, potatoes, carrots—first. Then add juicier elements—onions, celery. Last of all, mix in wet ingredients such as canned tomatoes and broths.
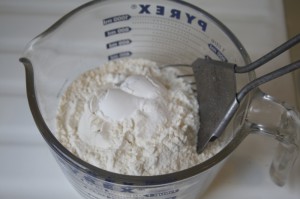
In a hurry? Use two large measuring cups instead of multiple bowls and measures.
- Add salt to pasta water before heating—it will boil faster.
- Use a large flexible cutting board that lets you chop all veggies without removing them to separate bowls and eases scooping and transferring foods to stove, see photos.
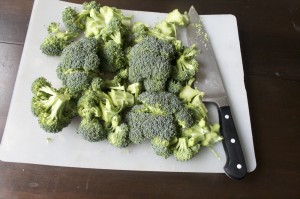
A large-surfaced flexible chopping mat lets you chop large quantities at one time then...
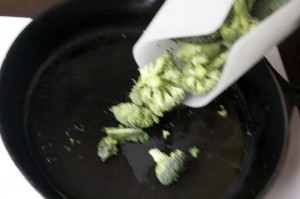
...move chopped food directly to the stove. Flexible chopping mats are also great for rolling out dough. - Clean as you go. Sometimes it’s just a rinse or a quick swab. Get it done now and you’re spared a massive mess later.
- Speed-chill and speed-warm foods. No need to “chill dough for at least two hours.” Instead, pop it in the freezer until firm enough to handle—usually less than 20 minutes. Conversely, to hasten cooking and serving time, pull maple syrup and butter from fridge and allow to warm to room temperature—or microwave for 5-10 second pulses—while you prepare the rest of the meal.
- Freeze meats in marinade. Make a quick marinade, pour over meat in temperature-proof container and freeze. If stored in a baking pan and covered with foil, meat will go directly from freezer to oven: Place in oven at lower temperature for first 15 minutes then turn-up oven and bake as usual.
- Cook partially-thawed meats and vegetables. If you’ve cut, prepared and frozen chicken or chopped meat in meal-sized portions, there’s no need to completely thaw before cooking. To separate pieces, let meat warm for a few minutes at room temperature or pulse for 10 seconds a time in microwave. Proceed with recipes, putting frozen meat directly into the skillet to brown. Be sure to lengthen your recipe’s simmer or baking time slightly to assure meat is cooked through. When you need a tablespoon or two of chopped onion, save time and waste by nuking frozen onions, see #22 below, for 10 seconds at a time. Scoop what you need of the partially thawed onions and throw directly into a hot skillet or sauce.
- Move dishes directly from stove to table. Invest in a good Dutch oven, pretty enamel cookware, vintage Pyrex and glass oven-proof containers. Attractive all-purpose pans let you place cooking pots on table—at least for family meals—and move leftovers directly into the refrigerator.
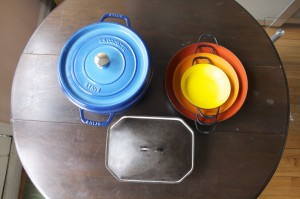
Many enamel pots—both new and vintage—transition nicely from stove to table to fridge.
Ready for more advanced foodie shortcuts?
Once you’re scratch cooking regularly, you may want to stretch beyond basics, try more complex recipes, or cook for crowds. Here are some advanced shortcuts that can streamline labor-intensive cooking tasks.
- Advance-prepare ingredients. The busier you are, the more sense it makes to process larger portions of food—such as chopped onions—and store extra for later use. This is an efficient secondary task while you’re “flow cooking”: You’re handling the food anyway, why not handle a little more? Chop three onions instead of one. Advance prep salad greens. Peel and slice carrot sticks. Store food in air-tight containers, preferably tempered glass, and chill or freeze until ready to use.
- Pre-cook and store a large batch of onions and garlic. I can’t think of many dishes—from Indian to Mexican to French to Italian, from soups to stews to curries to chili—that don’t start with a base of gently fried onions, usually cooked with garlic and sometimes with celery or carrots. Make a triple portion, cover tightly in a glass food container, keep in fridge and spoon out as needed throughout the week.
- Bulk-prep bread crumbs, croutons and other basics like ground or toasted nuts and store in air-tight containers in fridge or freezer.
- Mince and store fresh garlic and ginger. Every foodie knows there’s no substitute for fresh garlic and ginger. For closest-to-fresh flavor, mince garlic or grate peeled ginger and store in one-cup glass food containers. Cover with oil and seal with tightly fitted lid. Note: Be sure to use a mild oil, such as canola—rather than olive oil—to allow garlic or ginger flavors to dominate.
- Freeze chopped fresh herbs in ice cube trays. Dry herbs can’t substitute for fresh in many dishes, especially ethnic specialties. To assure you’ll always have fresh herbs on hand, fine-chop mint, cilantro, basil, parsley and other green herbs. Place a few teaspoons in each compartment of an ice cube tray, cover with water and freeze. When solid, pop out and store in freezer in a labeled container. I found this great tip—and other marvelous culinary suggestions—at the about.com page of Indian cook Petrina Verma Sarkar.
- Prepare your own dry mixes for pancakes and quick breads. You can measure and mix flour, sugar, salt and leavening, pour into an air-tight container and store in fridge. When ready to use, add eggs, milk, butter or oil and bake.
- Prepare double batches of soups, pasta sauces, stews and dips. It’s just as easy to make two portions of marinara or hummus as it is to make one. In addition to dinner entrées, make extra batches of pancakes, waffles, muffins and moist quick breads when baking—great for an effortless home-cooked weekday breakfast.
- Label and list stored foods. It’s great to have a freezer stacked with yummy meals and handy prepared ingredients. But not if you can’t find them. Before storing containers in the fridge or freezer, label them. Nothing fancy or complicated: I use a roll of masking tape and ballpoint pen. Be sure to label food containers before chilling food: Adhesive-backed tape doesn’t stick to chilled containers. Truly organized cooks post a list on the fridge to jot down and cross-off items as they move in and out. Note to self: Do this.
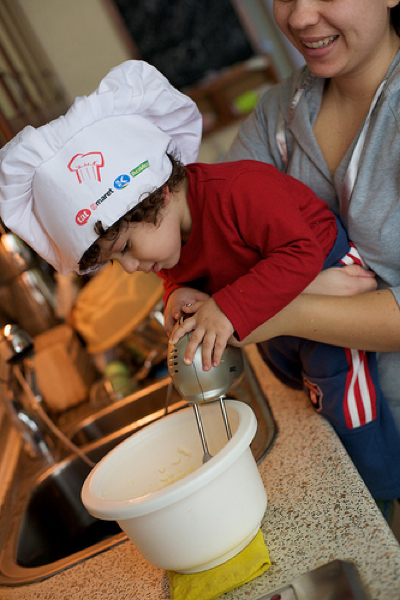
- Don’t try to be a one-man band. Enlist your spouse, partner, children or roommates to help with shopping and meal preparation. At Copywriters’ Kitchen we encourage child labor: Let your youngest kids set and clear the table, older children prep salads and meal ingredients and teens cook whole meals. Yes, it’s an adjustment, especially for the slackers—I mean family members—new to cooking. But unless homemaking is your full-time job and you find it totally fulfilling—in which case, will you marry me?—insist on getting adequate support.
Photo courtesy of Tasslehoff Burrfoot.



What useful tips!!!
Why, thank you Iland Girl.
The more time you spend in the kitchen, the more shortcuts you find.
I wanted to include more PHOTOGRAPHS to illustrate this 2-part post, but WordPress, my blogging software, wouldn’t cooperate.
Please feel free to add your own kitchen tips!
I completely agree about cleaning as you go – OH MY WORD, it makes such a difference in the overall process! BTW, on the topic of ice cubes, I just read a cool tip about freezing leftover chicken stock (or similar liquids), to pop out when you want it. Clever, right? Could have saved me from wasting the cup or so that went bad.
Hi Shannalee:
Yes, that IS clever. Seems ice cube trays are a great way to freeze lots of different things in tiny portions–just read a suggestion from Foodimentary (on Twitter) to freeze leftover coffee to use for iced coffee.
Please let me know if you think of any other Ice Cube Tips!
Oh, these are great tips! I particularly loved the freezing herbs one!
I also freeze fresh lime or lemon juice in cubes and put them in a container in the freezer. I love using them for soups because it brings out the flavour so much more!
This works well also if the lemon/lime is beginning to look a touch ‘old’! Then I don’t waste them!
Cindy H
Hi Cindy.
Great idea for aging lemons and limes–it’s always a shame to watch them get dry and hard–then not have fresh juice when you need it.
Love your site–especially the charming cookie stamps.