After scratch-cooking thousands of meals and baking hundreds of cakes, cookies and desserts, you can fool yourself into thinking you know everything there is to know about culinary basics.
But you would be wrong. And by “you,” I mean “me.”
This year I had a gustatory revelation in the form of whole spices. Of course, dusty cinnamon sticks and whole cloves always lurked in my spice cabinet. But aside from the occasional pot of mulled wine or cider, they went unused.
That was before I “met” Shayma at The Spice Spoon. By day Shayma is an economic adviser to the Canadian government. In her off hours she presides at her blog, sharing marvelous tales of family, food and far-off lands.
Stories and food that connect us across borders
Shayma’s sense-memory filled posts let us travel with her—across the seas and back in time—to watch Ami, Shayma’s mother, stir a pan of Ginger Chicken in the Pakistani Manner or Mader, Shayma’s grandmother, pass a plate of a samosas at the family’s ancestral home in Lahore.
The journey continues in our own kitchens as we cook and eat the foods Shayma describes: Her recipes—reflecting her family’s Pakistani-Afghan-Irani heritage—make us a part of the story.
Adventures in whole-spice cooking
So thanks to Shayma, this year I started using whole spices with abandon. Today, I not only add whole cumin to Shayma’s Cumin Potatoes or Aromatic Scrambled eggs, but I also sprinkle them in my bean salads, hummus and more.
When ground spices are called for, I try to take a few minutes to grind them freshly. This year my favorite Christmas shortbread cookies use a spoonful of divinely fragrant, freshly ground cardamom. And I’ve incorporated freshly ground garam masala—a “hot mixture” of peppercorns, cloves, cumin seeds, cinnamon, black, brown, & green cardamom, nutmeg and more—in everything from apple butter and applesauce to this mincemeat.
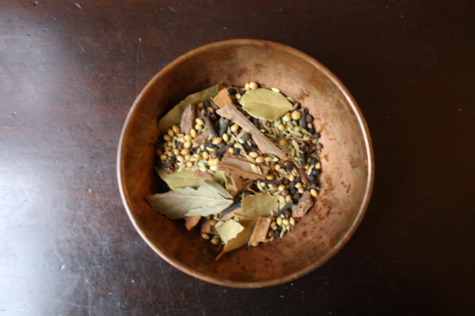
Finally. The mincemeat recipe.
If you like mincemeat—and why would you be reading this far if you didn’t?—please make this recipe. Aside from some chopping, it takes little preparation. And needless to day, Homemade Mincemeat with Garam Masala tastes infinitely superior to jarred versions.
Traditional mincemeat calls for suet, the tender fat found around beef kidneys. Good luck finding it. Today’s factory farmed meat comes pre-cut with most off-cuts and fat discarded.
To get suet, you need to know a reliable local farmer. Unscrupulous butchers pass off beef fat for suet: Since animal fat holds toxins, you need to buy suet from a grassfed animal that’s ingested few or no antibiotics. Order suet in advance so the farmer can request its careful handling and preservation at processing time.
I didn’t order suet from Hemlock Hills Farm in time for Christmas. So I made do with unsalted butter—a fine substitute, especially if you have vegetarians in your family.
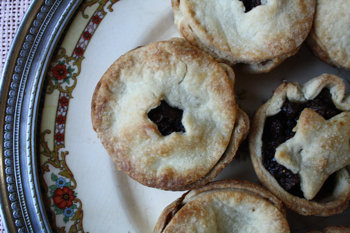
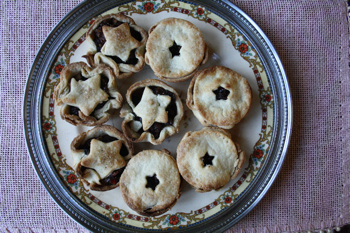
Homemade Mincemeat with Garam Masala makes a great pie and even better mincemeat tarts, a tradition from my Yorkshire ancestors, see recipe below.
Mincemeat improves with age so I hope you’ll do as I say, not as I do: I made my mincemeat this morning. If you can manage it, try to make yours at least a week in advance. Booze and spices preserve this luscious fruit mixture for months. Just keep in an air-tight container in the fridge and give it a splash of brandy or rum each week.
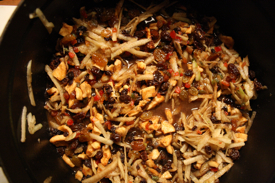
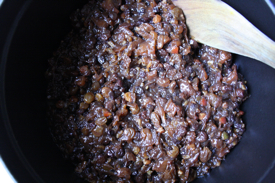
Homemade Mincemeat with Garam Masala Recipe
4 cups apple cider, plus extra if needed
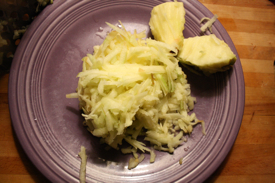
2 large tart apples, peeled and grated
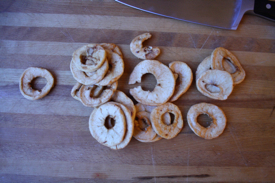
1 cup dried apples, chopped
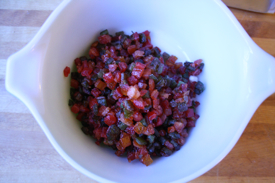
1 cup dried figs, chopped
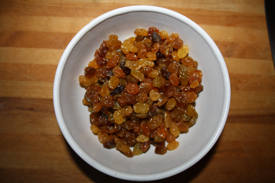
1 cup dark raisins
1 cups golden raisins
1 cup dried currants
2/3 cup mixed candied fruit, minced fine
1/2 cup Demerara or brown sugar
1/4 cup dark rum
1/4 brandy or cognac
4 tablespoons grassfed beef suet, ground—or substitute unsalted butter
2 teaspoons garam masala, freshly ground, if possible
1 teaspoon ground cinnamon
1 teaspoon ground allspice
1/2 teaspoon freshly ground nutmeg
1 teaspoon ground cloves
1/4 teaspoon salt
- Combine all ingredients in a Dutch oven or large heavy pot, stirring well to mix.
- Bring cider to a boil. Reduce flame to medium low and simmer fruit for at least an hour, stirring frequently. You’re aiming to cook the fruit to maximum, juicy plumpness and reduce the cider to a thick, sticky syrup. So you may need to cook the mincemeat a little longer, stirring frequently and adding additional splashes of cider as needed. Toward the end of its cooking time, watch mincemeat carefully. As the cider turns syrupy, it’s easy to burn the bottom of your pan.
- Remove mincemeat from stove and cool completely before using as filling. Store leftover mincemeat in an airtight container. As mentioned, it keeps for months—provided you give it a little drink of brandy or rum weekly, stirring the liquor in thoroughly.
Best Homemade Mincemeat Tart Recipe
2 cups Homemade Mincemeat with Garam Masala, see recipe above
Crust:
3 cups flour
1/2 teaspoon salt
3 tablespoons sugar
1/2 cup Crisco or other vegetable shortening
1/2 cup—1 cube—unsalted butter
- Preheat oven to 375 degrees.
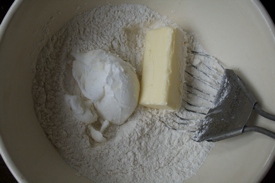
- In a large bowl, blend flour, salt and sugar.
- With a pastry blender, a whisk or your fingers, cut in butter and shortening. Butter should be slightly cold, but soft enough to incorporate into flour and salt mixture. In the past I managed the butter’s contradictory cold-soft state by grating the butter: It stayed cold enough to remain solid in the dough mixture, but airy enough to blend. Today I soften the butter ever so slightly by microwaving it 2-3 seconds at a time. If you opt for nuking, proceed carefully. The goal is soft—not warm or melted—butter. Blend the fats into the flour and salt until the mixture is mealy.
- Fill a small glass with ice cubes and water. Sprinkle four tablespoons of ice water over the flour and butter mixture, tossing with a whisk or your fingers.
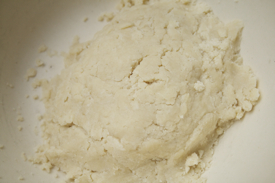
- Press the dough into a mound. If the mound holds, you’ve added enough water. Sometimes it only takes a few tablespoons—moisture levels in butter and flour vary. If the mixture is dry and crumbly, however, add another tablespoon of ice water, toss and gather to see if it holds together.
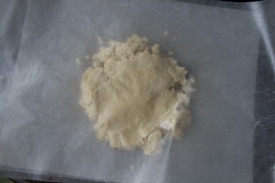
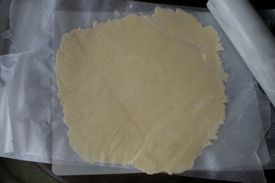
- Once the dough holds in a mound, transfer it to a sheet of wax paper laid out on a flat surface. Push the dough ball down slightly and cover with another sheet of wax paper. My gourmand college-aged son chills the dough before rolling. I feel this makes the crust denser: I roll immediately after mixing.
- Using a rolling pin, roll out the dough. You can pinch off and patch some dough to fill in gaps. Roll the dough as thinly as possible—these double-crusted tarts are better with thin, flaky crusts.
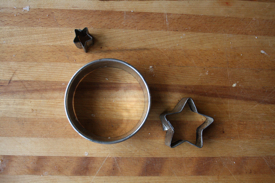
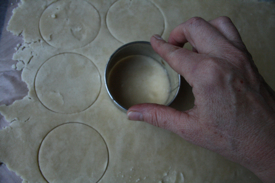
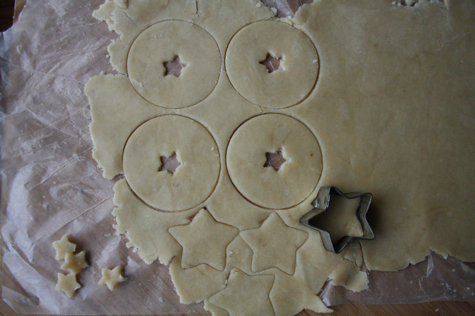
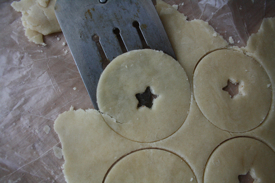
- To fill 3″ tart tins, use a large biscuit cutter or a glass to cut eight 4” rounds for bottom tart crusts. You may vary the top crusts: Cut an additional eight 3” rounds, or use a cookie cutter to cut eight 3” stars. If dough becomes too soft to handle as you’re working with it, slide dough and wax paper onto a cookie sheet and chill in fridge for a few minutes.
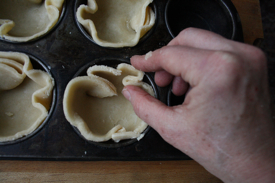
- Using a spatula, slide pastry circles into muffin tins, pushing them into the tins to make a well. Note: Don’t push dough closely into sides of tins or your will have trouble removing them after baking.
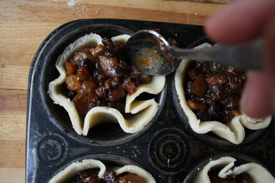
- Fill the wells with mincemeat.
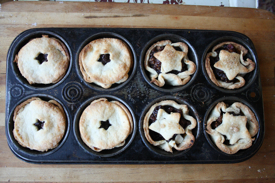
- If topping tarts with dough rounds, you may cut a decorative shape in the crust tops—see photo above. Using a spatula, slide top crust onto mince-filled tart. With your finger and a fork tine, seal rim of tart. Repeat, putting top crusts on remaining tarts and sealing.
- If using star-shaped top crust, use a spatula to slide star into top of crust. Sprinkle with Demerara sugar.
- Slide tin into oven and bake for 15-20 minutes until crust is golden.
- Let tarts cool for a few minutes before sliding a knife around sides to loosen and lift out tarts.
Makes eight 3″ tarts.
